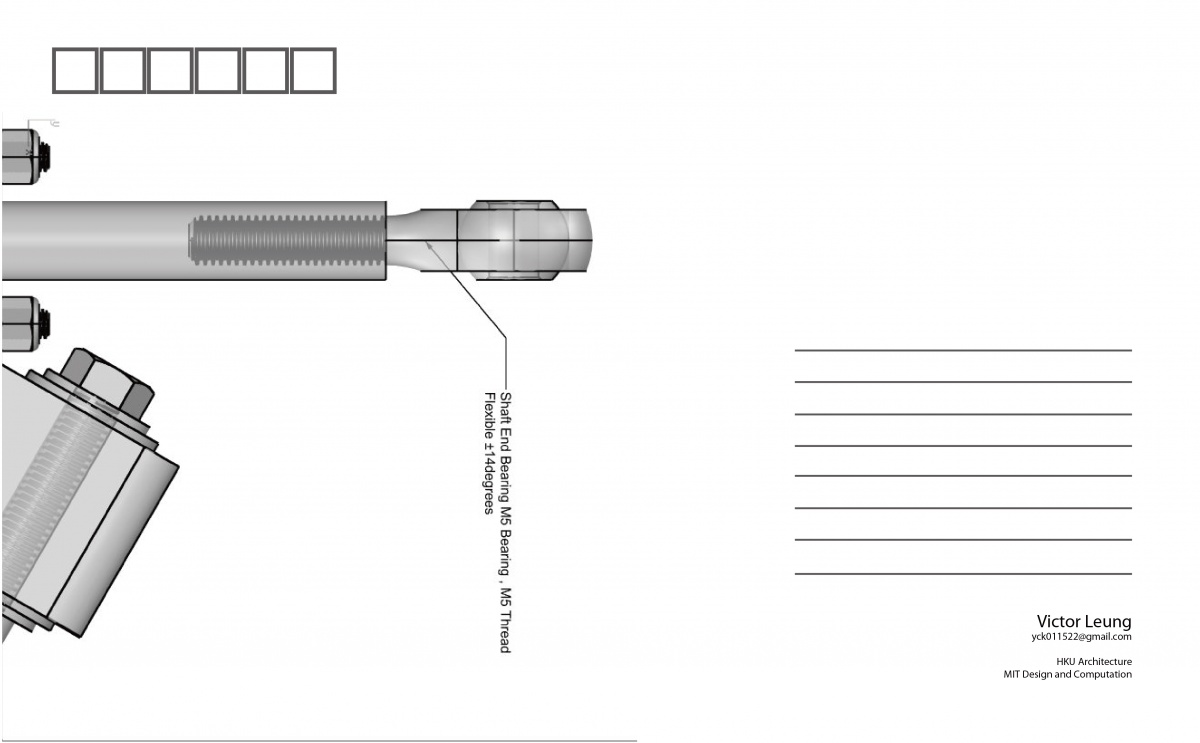
We present a modular mechanical system for materializing dynamic architectural surfaces. The resulting structure utilize principles of triangular space frame to create structural support for architectural surfaces such as roof and wall. The space frame consist of two layers of expandable triangular modules connected via fixed-length struts. The triangular modules can be digitally controlled and actuated by servo motors to vary the curvature of the assembled frame. The innovation lies in the expandable triangular module that undergo a pattern shift as it expands, creating an aesthetically pleasing motion as it transforms. We demonstrate a scaled model, constructed with 18 movable modules controlled by a Arduino microcontroller. It is assembled into a space frame that is expandable from 1.5m to 2.5m in width and capable to be programmed into various posture. We discuss the engineering and architectural challenges of constructing such structure.
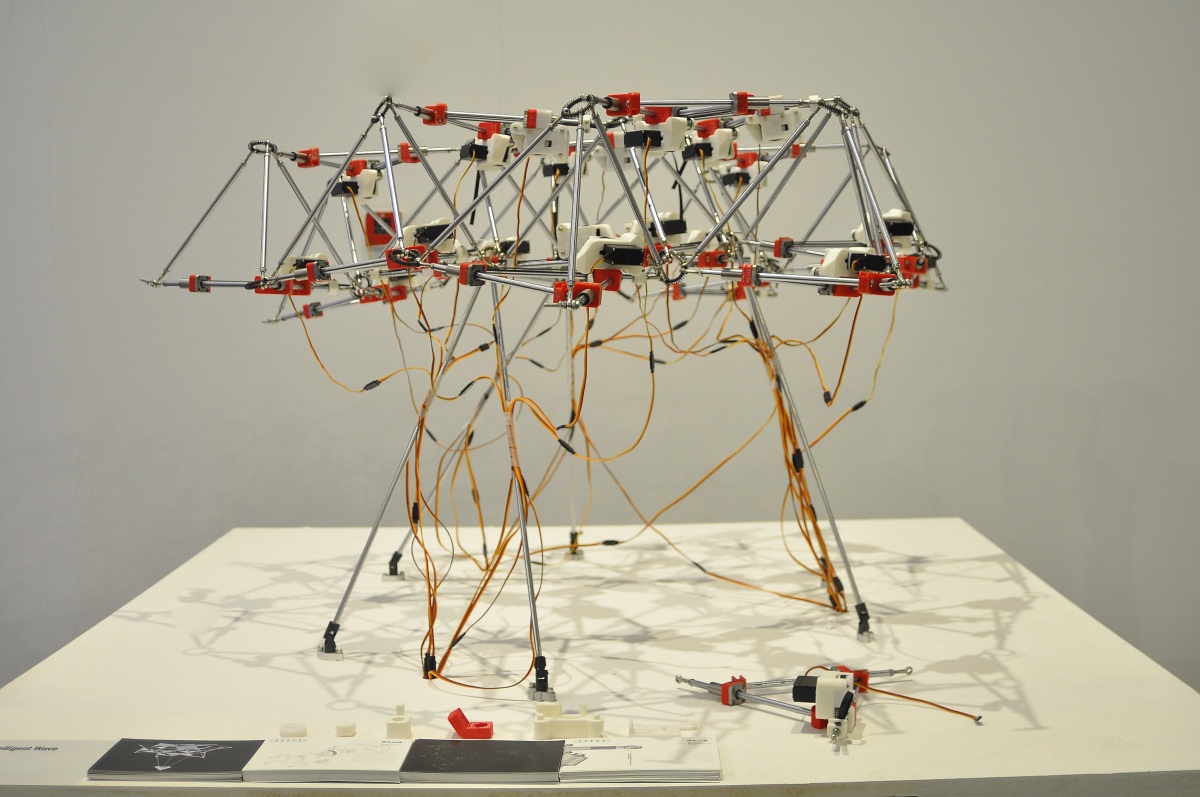
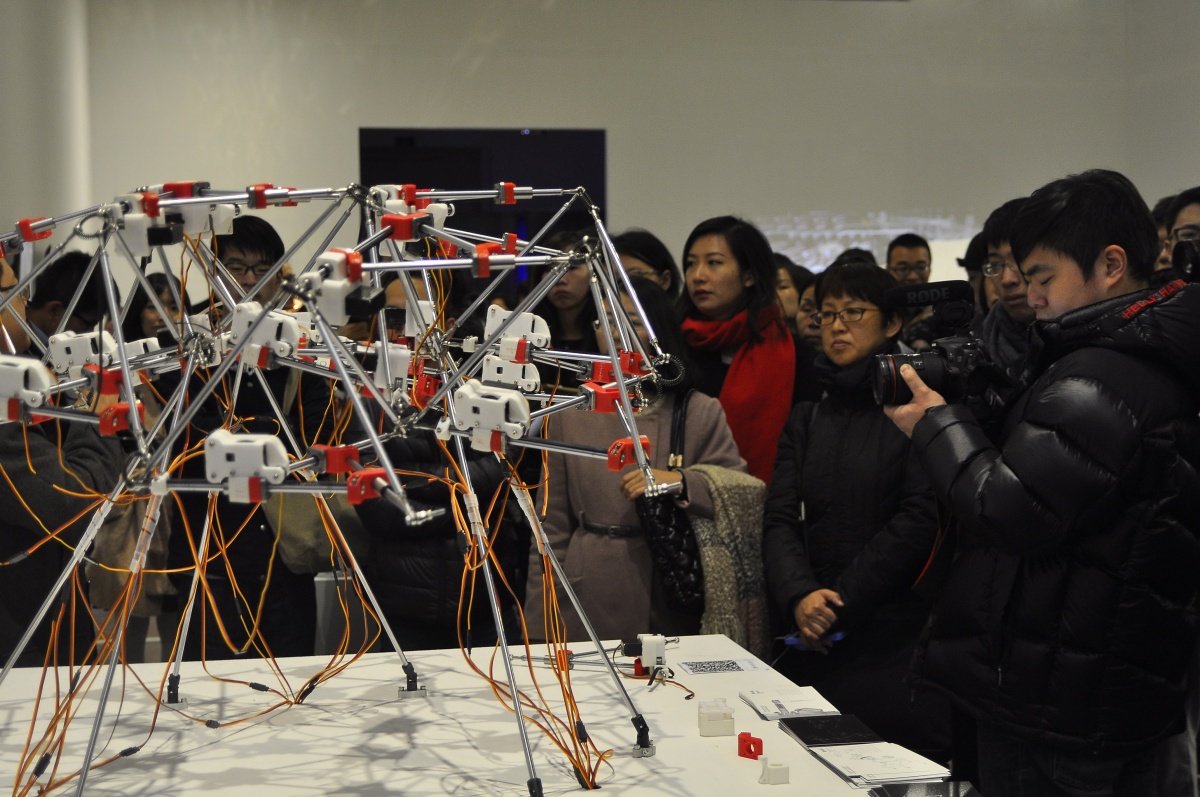
The project is presented and demonstrated in the 10th Shanghai Biennale.
This project is  a collaboration with 高岩 Gao Yan (Department of Architecture, HKU, dotA) éƒé¦¨ Guo Xin (Department of Architecture, University of Shenzhen, dotA). I serve as technical investigator. Assisted by æ¬§é˜³æ° Ouyang Jie (SZU, dotA) Design Researcher 钟鸣 Zhong Ming (University of Shenzhen) 黄泳三 Huang Yong San (University of Shenzhen) 蔡楚辉 Cai Chu Hui (University of Shenzhen, dotA).

All the plastic pieces are printed on a Makerbot Replicator 2. A lot of effort is made to work with the constantly jamming print head. I add an oiling device at filament in-feed, providing some machine oil to ‘lubricate’ the filament (although community discussion seems to favor Canola Oil). And I use a custom slicer setting adjust the slicer setting to reduce the ‘retractDistance’ to 0.5mm.

20 Sets of Motor Assembly are printed over the time of a week, printing day and night.

Some 3D printing community had a many discussions on how to calibrate your 3D printer with test files. This can inform the slicer settings to print objects that are more ‘true’ to the modeled objects.  Tests to confirm the size of screw holes and snap fit items. I didn’t pursue this route simply because I have already spend much time making the printer not ‘jam’, I didn’t want to further modify the slicer settings. So I did a very basic test to determine the hole sizes I need to use.