Responding to the request from Rodolfo Santos asking me to share the scripts about the 2D bending that I did some time ago, I finally got an excuse to find time to tidy my scripts and to add some comments into it to make it more readable. I have shared the basic script in the previous post, here I’ll show how to add some fillet and offsets to make the output more friendly for CNC process. I have only done a few test myself due to machine limitation, but they are pretty successful.


This is my first test with a perfect geometry which offset with only the bit radius to get the tool path. It fail to assemble tightly because of tolerance problem. The two pieces are larger than the calculated geometry. This is what I guess happened: Because of the wood I am working with is a rather soft wood, the fibers have a relatively high elasticity. When the drill bit of my CNC router cuts the wood, the cutting edge presses against the material and tries to cut it, unavoidably compressing the material locally at the cutting point. After the drill bit left the local area, the wood fibers rebounces/decompress and made the cut path smaller. In other words, if you have a 5mm bit and make the router to route a straight line, the trench (cut away part) will be less than 5mm. Here in my case, if I’m using the bit to route the outer edge of my geometry, the geometry will be larger then what I need. This elastic property depends on the material you are using, the sharpness of the bit, CNC feed speed and spindle speed, pretty complex. So I suggest that you fix your router settings and assume your bit  is pretty sharp, and do a couple of test to see what value works best for you.
I have forgot the value I used in my test, I’m so sorry. If that is pretty difficult to determine, try something like -0.1mm first.


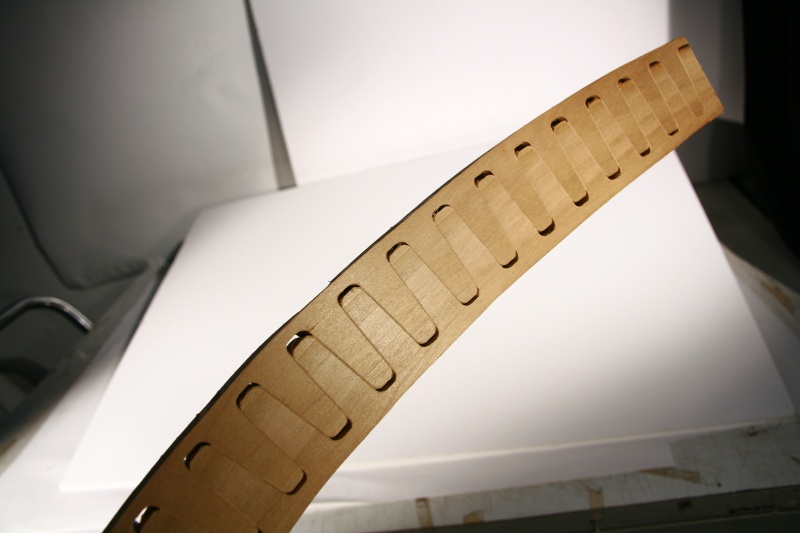
This test piece got a nice tolerance value and assembled pretty perfectly. I didn’t even need to use glue here because the friction between the two wood surface is so high that I find it difficult to separate them. This is also why I would not use a dove-tail teeth for CNC-wood because you will never be able to assemble it.
The script here automatically takes the output from the basic script (zip2.ghx) and fillets the teeth for CNC router. This is important because (3-axis) routers are not able to cut the sharp internal corners that the piece need. We need to fillet all the internal corners by half of the bit’s diameter. And because the external corners of the teeth have to fit into those filleted corners, that is why they have to be filleted too. The script also creates an offset for the CNC tolerance issue, it operates on the geometry after the fillet, making it slightly smaller.
Finally if you are using some CNC plugin (such as MadCAM that my school is using) you are able to define a tool path. (Tool path here refers to the path that the center of the tip of the drill bit is supposed to follow) So I have created an alternative output that is the tool path, which is an offset (bit radius) from the previous output (the one with tolerance adj).

In this example I have drawn a 800mm long curve. This curvature shown here is pretty high already, if you are doing your first test, try something with a smaller curvature.

Image above: The red line is the cut geometry after tolerance adj. The green line is the tool path.

Image above: This image shows a NOT WORKING example, either the drill bit is too large, the teeth width is too small or the angle is too extreme. Notice that the tool path at the valley merged into a V-shape, that will definitely fail.

Image above: This is not in a good proportion as well, but you can try it.

Image above: This one has a skin that is too thick, it won’t be able to bend.
Script Download:
zip3a_demo (Updated for GH 0.9.0076)