
The drawing board of the polargraph consist of mainly the board and its stand, and the mechanical linkages between the motors, the pen and the counterweight.
Belt and gear

The main role of the motor is to be able to pull the pen closer or further from the motor, with the help of a belt. A belt is a very easy way to transfer power in a precise way. Most polargraph designs have made use of curtain cables because of the presence of the beads on them, for example this one by Sandy Noble, the challenge of using curtain cables to drive the pen is that, you need to find a compatible wheel that fits with the beads on the thread, while that wheel have to be attached to the stepper motor’s shaft. Note that stepper motor comes in different shaft diameter depends on what you have bought. This particular accessory doesn’t seem to exist in the market so many designers had been using 3D printed custom made wheel to fit both. Of course, if I had access to a metal lathe and mill, I might be able to make a metal one too.
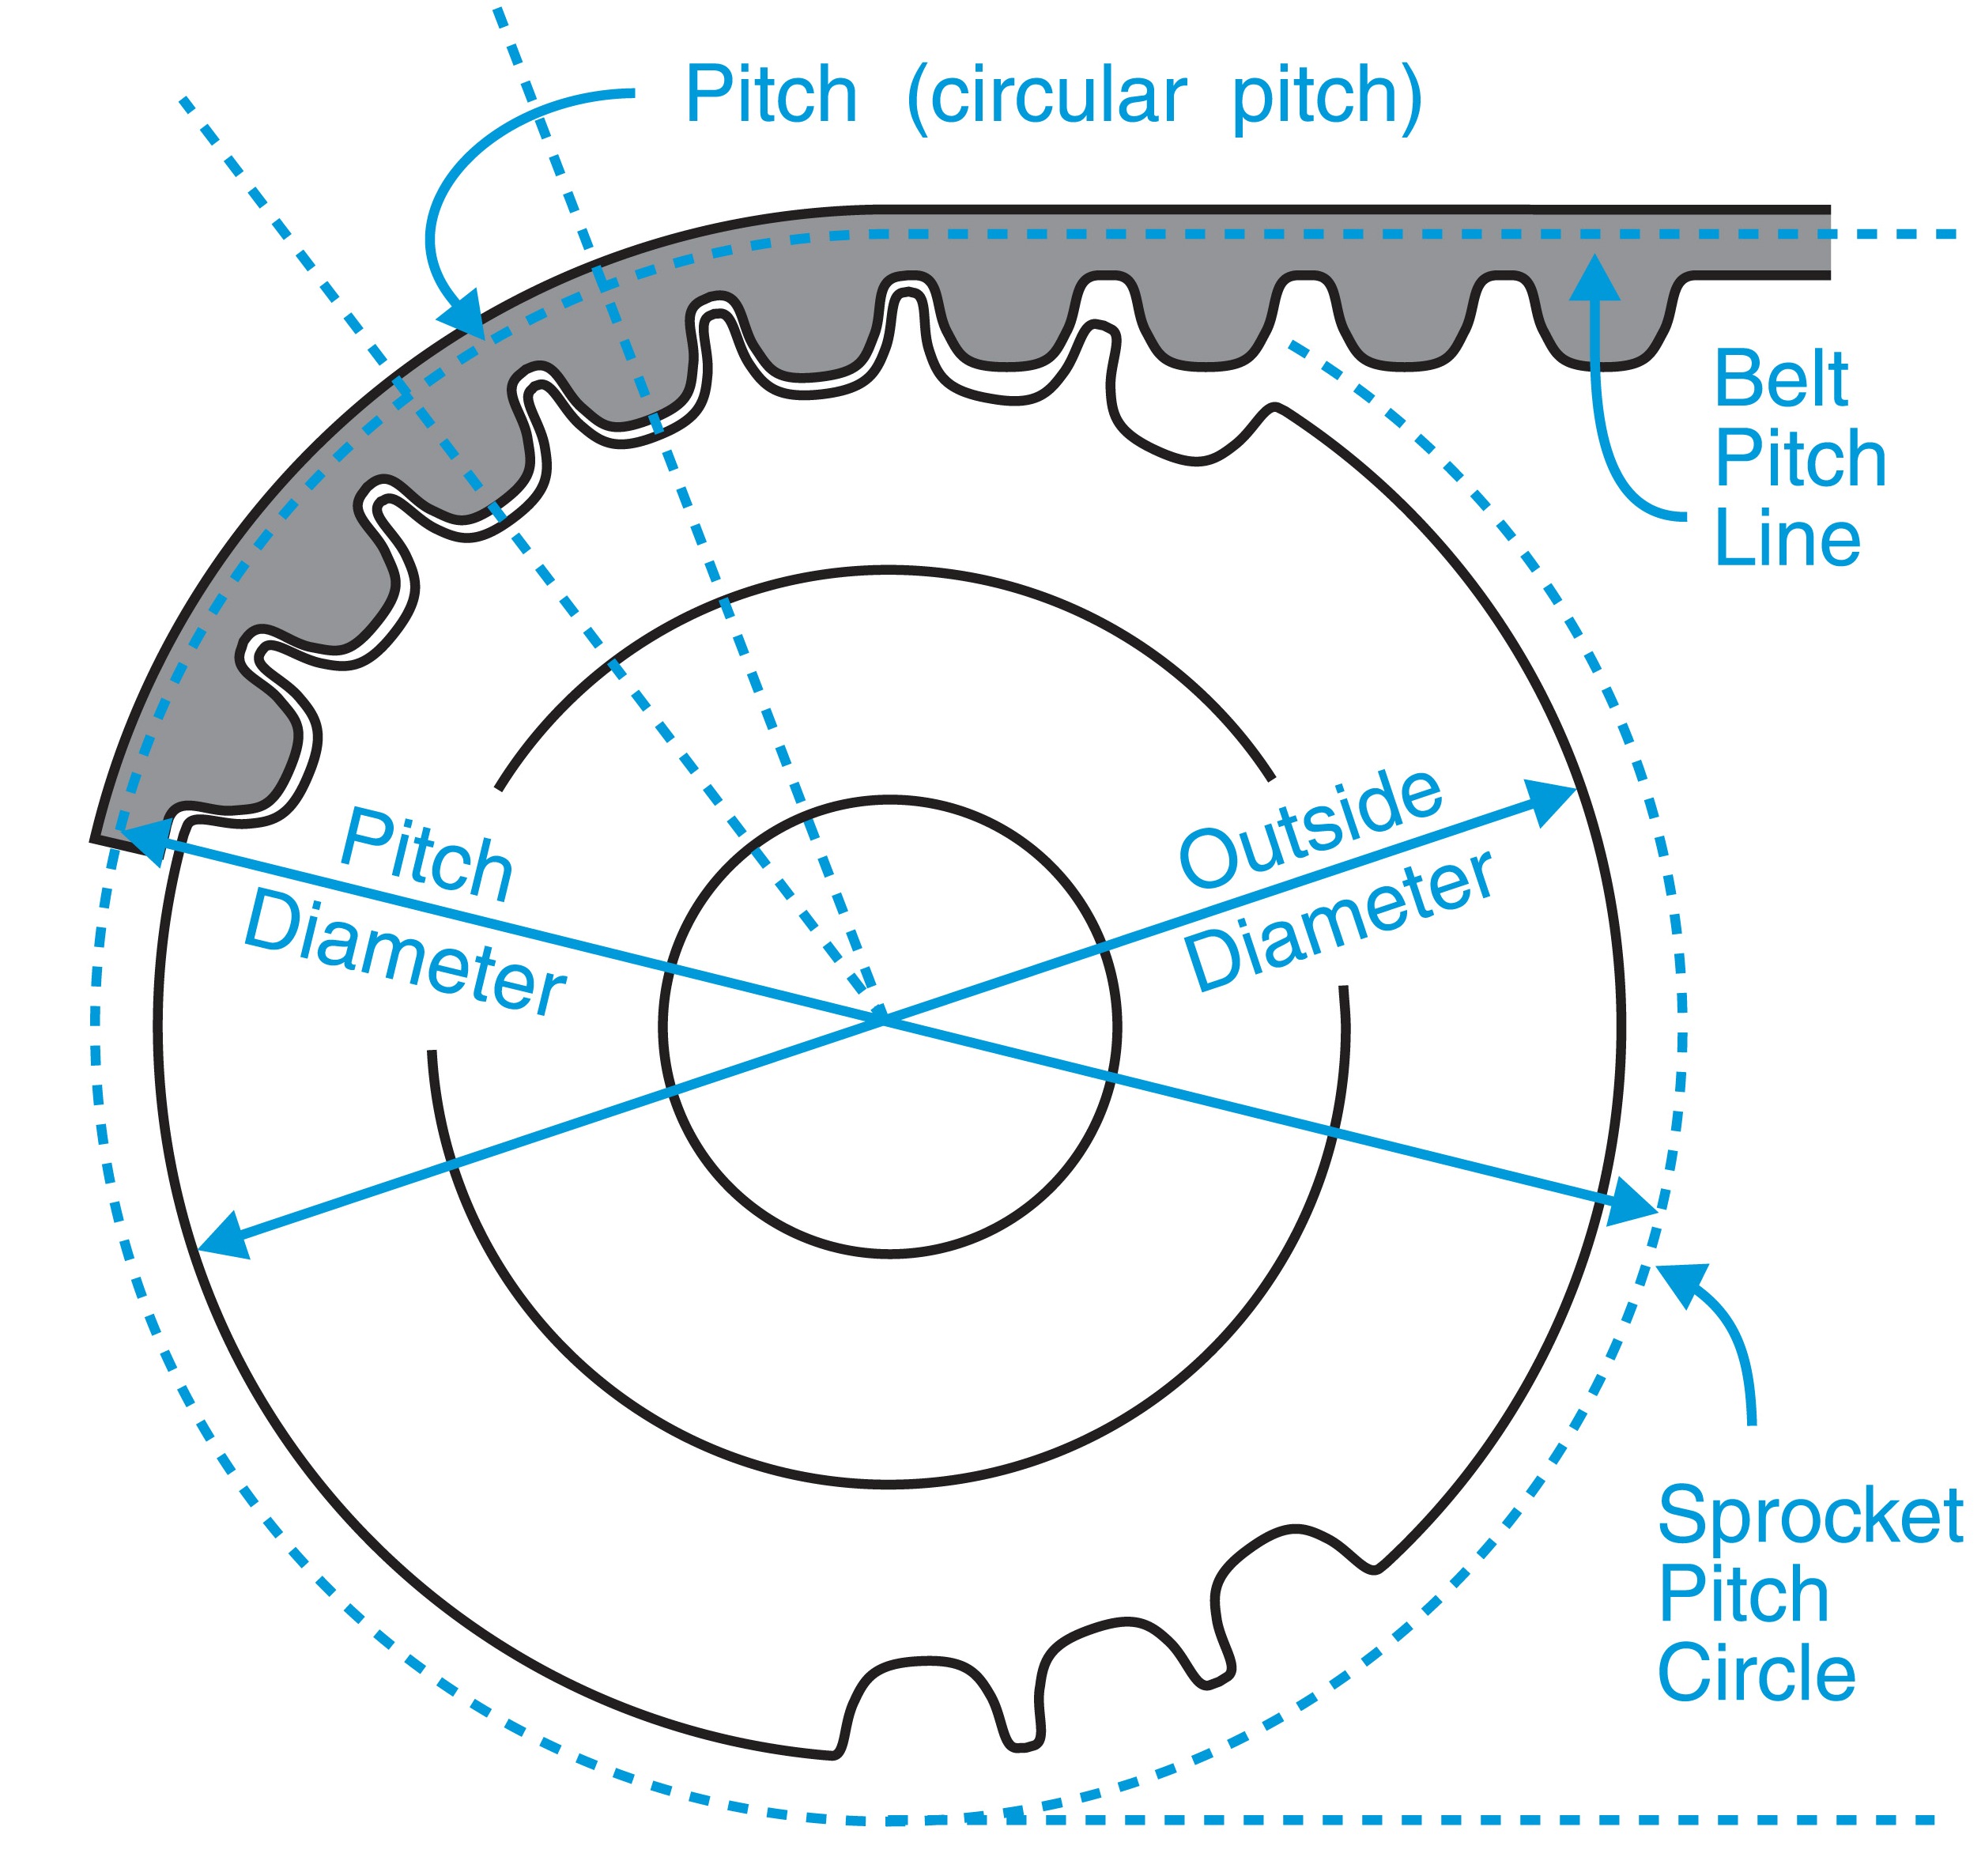
Neither do I have access to a metal workshop nor a 3D printer, I turned to the market in GuangZhou where there are lots of electronics and mechanical components. I bought second hand motors because it is already attached with a timing belt wheel, if you have no idea what a timing belt is, it is also called toothed belt. It is a flexible belt in industrial precision and strength,  that can precisely synchronize the movement of gears. Typical timing belt system can be find here, they are available in close loops or open loop, we need a open loop. I bought two piece of brand new MXL belt, 6mm wide, 2.8m long at CYN $80 each.
MXL has the smallest pitch (2.032mm) among the common choices, which means it is also the lightest. Getting a lighter belt is beneficial to the precision, because the pen is held down by gravity, if you want your pen’s position to be precise controlled just by the length of the belt, you will want to avoid the belt bending by its own and a lighter and thinner belt helps.
At the end of the belt, to secure it in place, I have bent the timing belt around a pin (teeth facing the pin) and using the teeth to look itself.
Gondola
The gondola is the most complex mechanical part in the machine. There are many designs available out there, I made my own based on what parts I can find.
You will also want the gondola (the device that held your pen) to have a reasonable weight. Too heavy, and the system will have more inertia, slower acceleration for the motors are needed, slower the system will be. Too light, the pen will not have sufficient force pushed onto the paper on the tilted board.
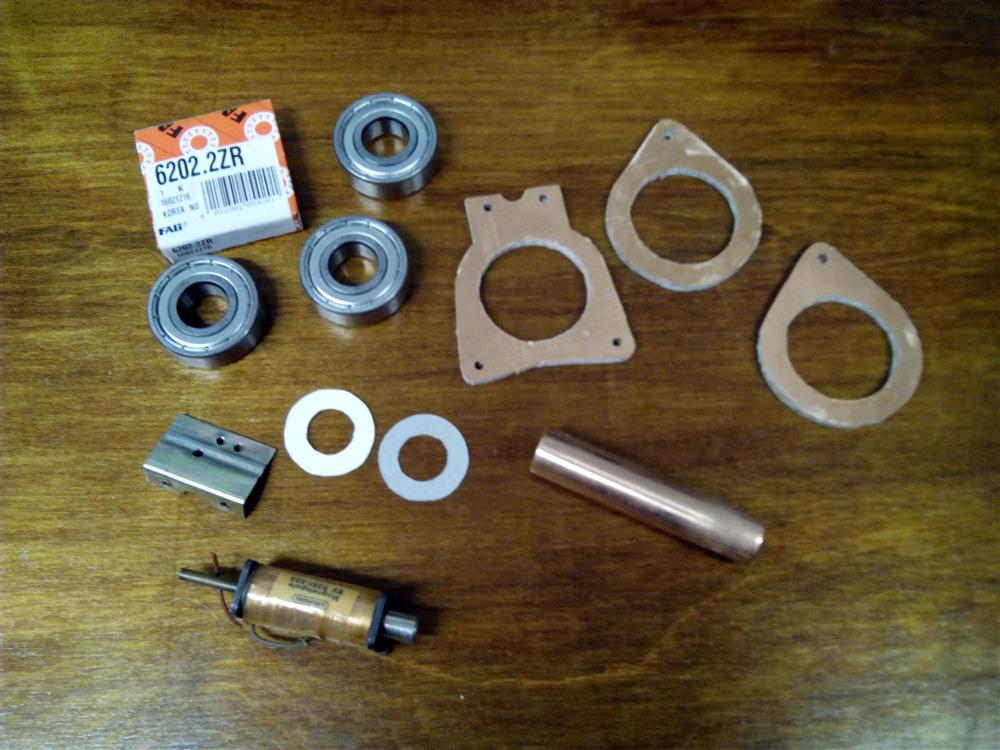
There are three bearings in my gondola (technically, you need only two). The two outermost bearing are attached to a teardrop shaped plate, which is connecting the timing belt. At the tip of the two teardrop, there is a small screw that allows the belt to loop over. The two pins are in different directions, so their center are more or less on the same plane. This balance is important, otherwise your gondola will want to twist.

The bearing is a very typical 6202 bearing, you can google the specs, but the inner diameter is 15mm. I find that copper tubings for air conditioning works have an outer diameter of 15mm too, this is a lucky match, but makes life easier to connect the three bearings together. I have to lightly sand the outside of the tube to fit. The tube is also very easy to cut using and hand saw, the cutaway portion is where a clip holds the pen. I added two cardboard washers between the three bearings to space them apart, added a split ring to lock the bearings in the right place on the shaft.
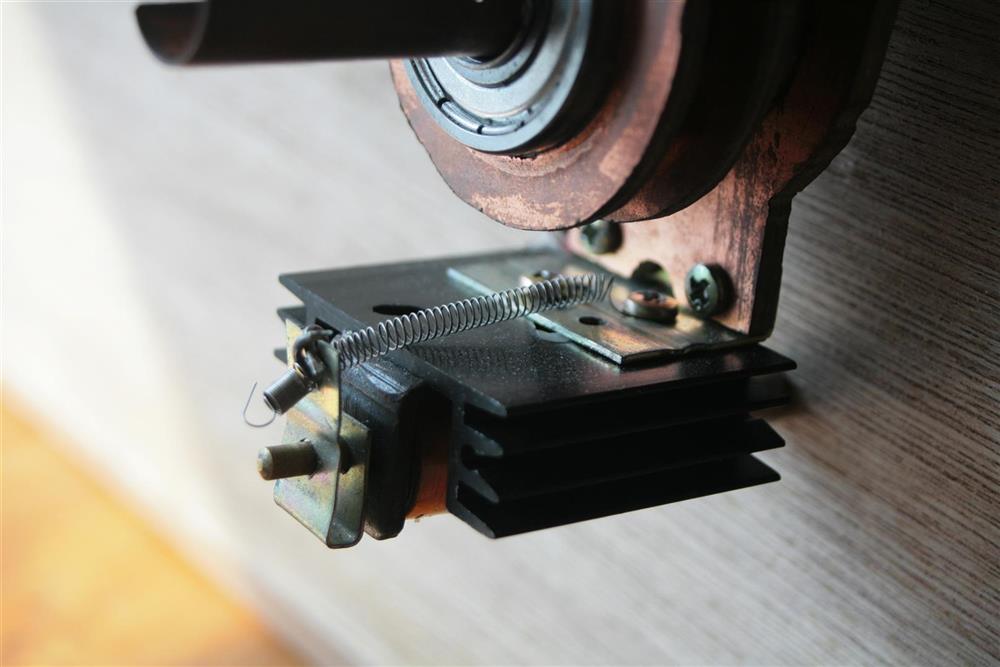
The solenoid is actually a later addition to the gondola although from the very early beginning, I leave space for it. The solenoid is how I can lift the pen from the paper. When power is applied to the solenoid, the center piston is attracted into the solenoid and locked in position. However, the solenoid I have at hand (from my father’s spare parts collection that is older than 20 years) does not automatically return into an extended position when power is removed, reversing the power also creates a attraction force, not an opposite force. Thus the spring is there to return the piston. I have designed that such that when no power is present, the solenoid is in the position of lifting the pen off the paper, that is when the spring is closed.

This is where I found many shops selling motors and CNC components.