On 5th October, 2016 and 2nd November, 2016, Victor Leung taught two sessions of Codekitchen Workshops titled Simple Robotics. Total of 76 students, ranging from undergraduate to PhD, benefited from this workshop. The workshop is hosted by the Digital Manufacturing and Design Center in Singapore University of Technology and Design.
Robotics is the branch of mechanical engineering, electrical engineering and computer science that deals with design, construction and control. In this workshop we will build a simple autonomous robot with sensors and motors and explore the implications in different control algorithms. This workshop is suitable for students with little background in robotics. We will hold a competition after class with prize for the fastest control algorithm.

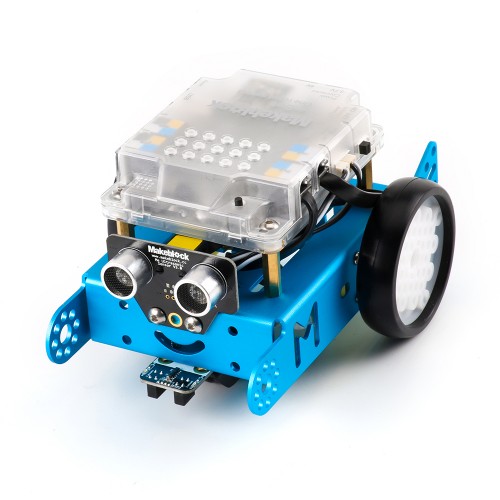
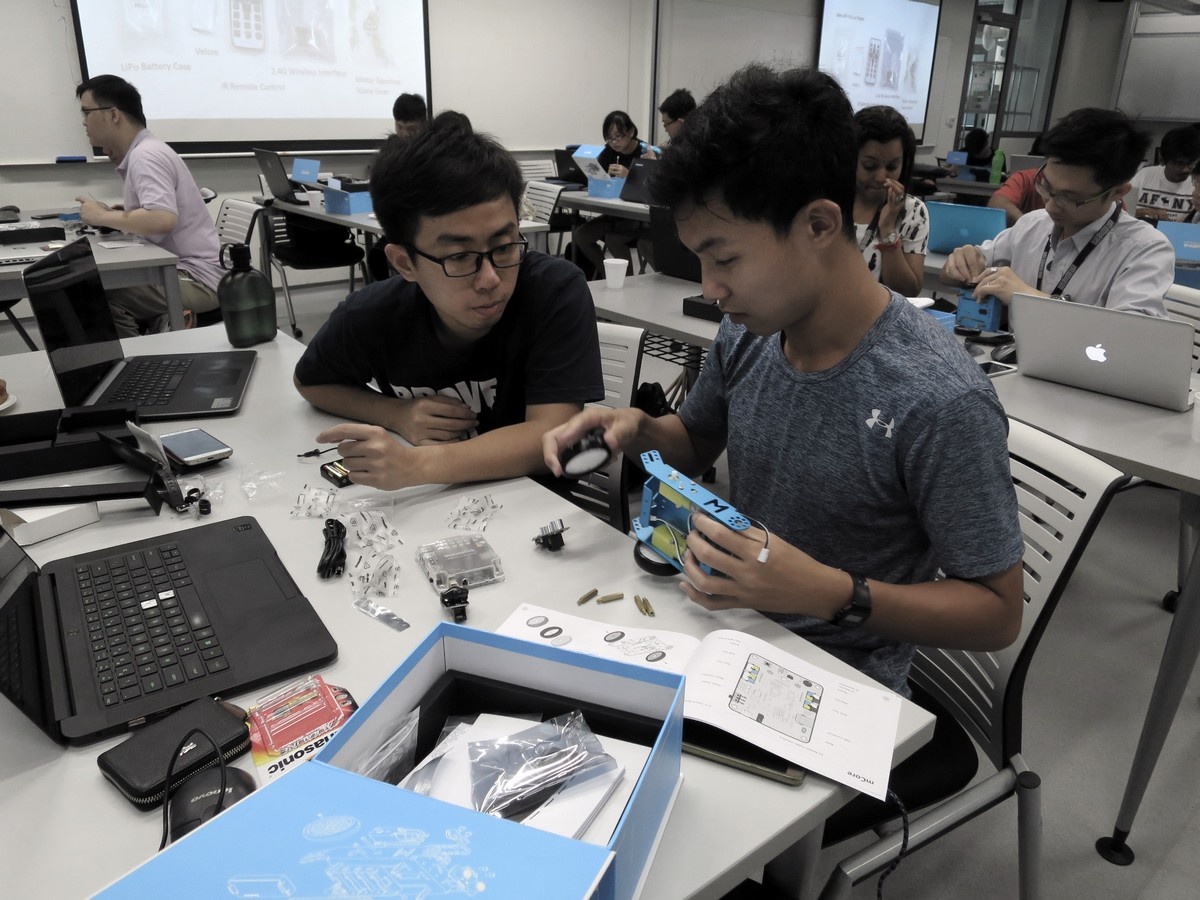
I have used Makeblock components for many times, but this is my first use of their robotic platform mBot. It is a small autonomous robot that bundles various sensors and actuators together, requiring only 15 to 20 minutes of very simple assembly. This is also the first time I teach a hands-on workshop that is so short (this is 2 hours,  my other workshops are at least 6 hours to multiple days). mBot’s rapid assembly fits nicely to the rapid teaching pace and students still enjoyed my quick introduction of how each component works. I briefly explained the caster wheel, the rubber tire, the robot frame, the geared DC motors, the IR based black-line sensor, the ultrasonic range finder, the RGB led and the Arduino based motherboard.
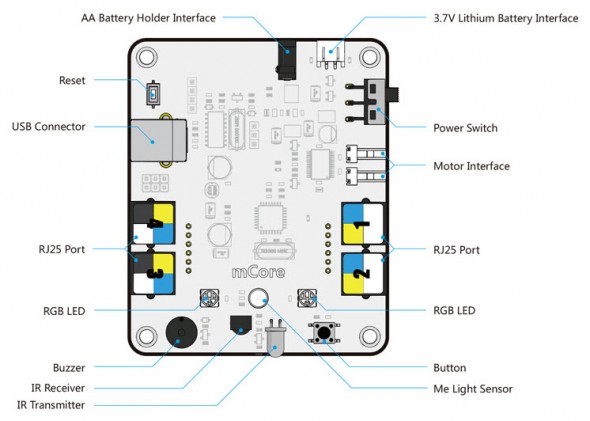
I decided not to use the Scratch based programming interface because I’m not teaching pre-school kids here. (to be honest, kids, are what mBot primarily designed for.) The motherboard of mBot is called mCore, and is supported by the Makeblock Arduino Library. When I prepare for the class, I could not find any good code examples or library documentations related to the functions on mBot. So I created this somewhat helpful mBot programming guide by looking at their mBot demo code they used for factory preload.  Students can reuse and remix these sample codes and that greatly reduces the learning curve.
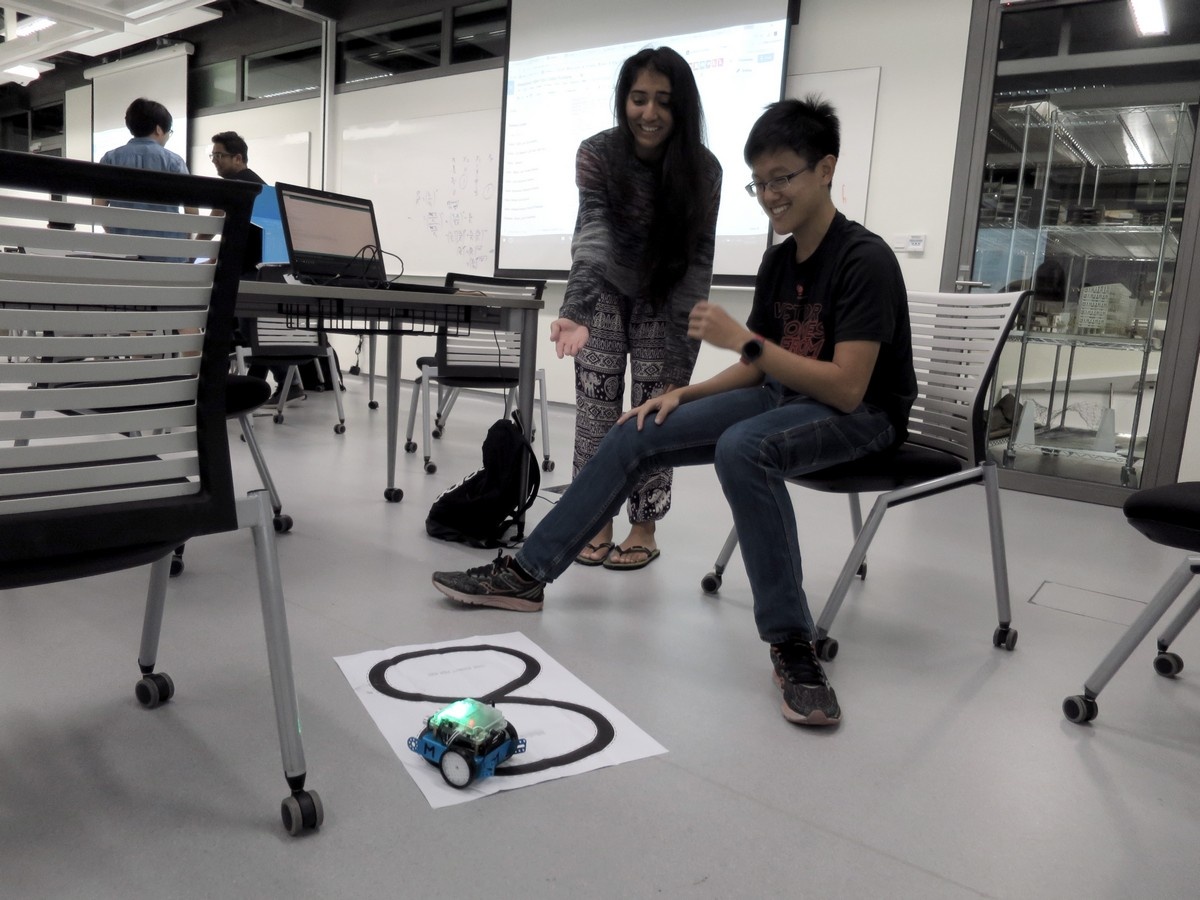
I have a slightly different focus on the two sessions. The first session focus on robot construction and understanding the various components. The second session put more emphasis on programming and optimization of algorithms. In both workshops, students worked in groups of two.


Students are very engaged in the whole process. Hands on exercise is very effective in engaging them because they are free to explore, make mistakes, correct and learn from the experience. Even with a few sensors and actuators, the combinatorial possibilities are huge. I only have to talk as much as to get them program their first algorithm and the rest is free play time.
We held a navigation algorithm competition at the second half of the class as an arbitrary goal for them to work on, students compete to design the fastest algorithms for their robots to follow a black line. I set up one of the robots as a timer judge, standing still, facing the black line. Anything that passes in front its ultrasonic sensor will trigger it to spell out the lap time on the big projected screen. Students can come to the track anytime to test their robots and see their time, they can then make adjustments and test again. Some student got creative and start programming integral controllers to steer the robot. One group decided to off load the unnecessary components (ultrasonic sensor, cable and casing) to reduce weight. It turned out to be pretty fun when they are competing against a tiny but measurable millisecond difference.